VetCheck TV Setup Guide
Thank you for choosing VetCheck TV to enhance the waiting room experience at your pet clinic. This guide provides step-by-step instructions on how to set up and manage your VetCheck TV display, ensuring your patients and their owners enjoy informative and engaging content about pet care.
Options
- Smart TV Browser
- Chromecast
- Save VetCheck TV URL and install to the desktop
- HDMI cable connected to a laptop
Each clinic using VetCheck TV will have a unique Clinic ID. To access your personalized VetCheck TV interface, simply request this URL from VetCheck.
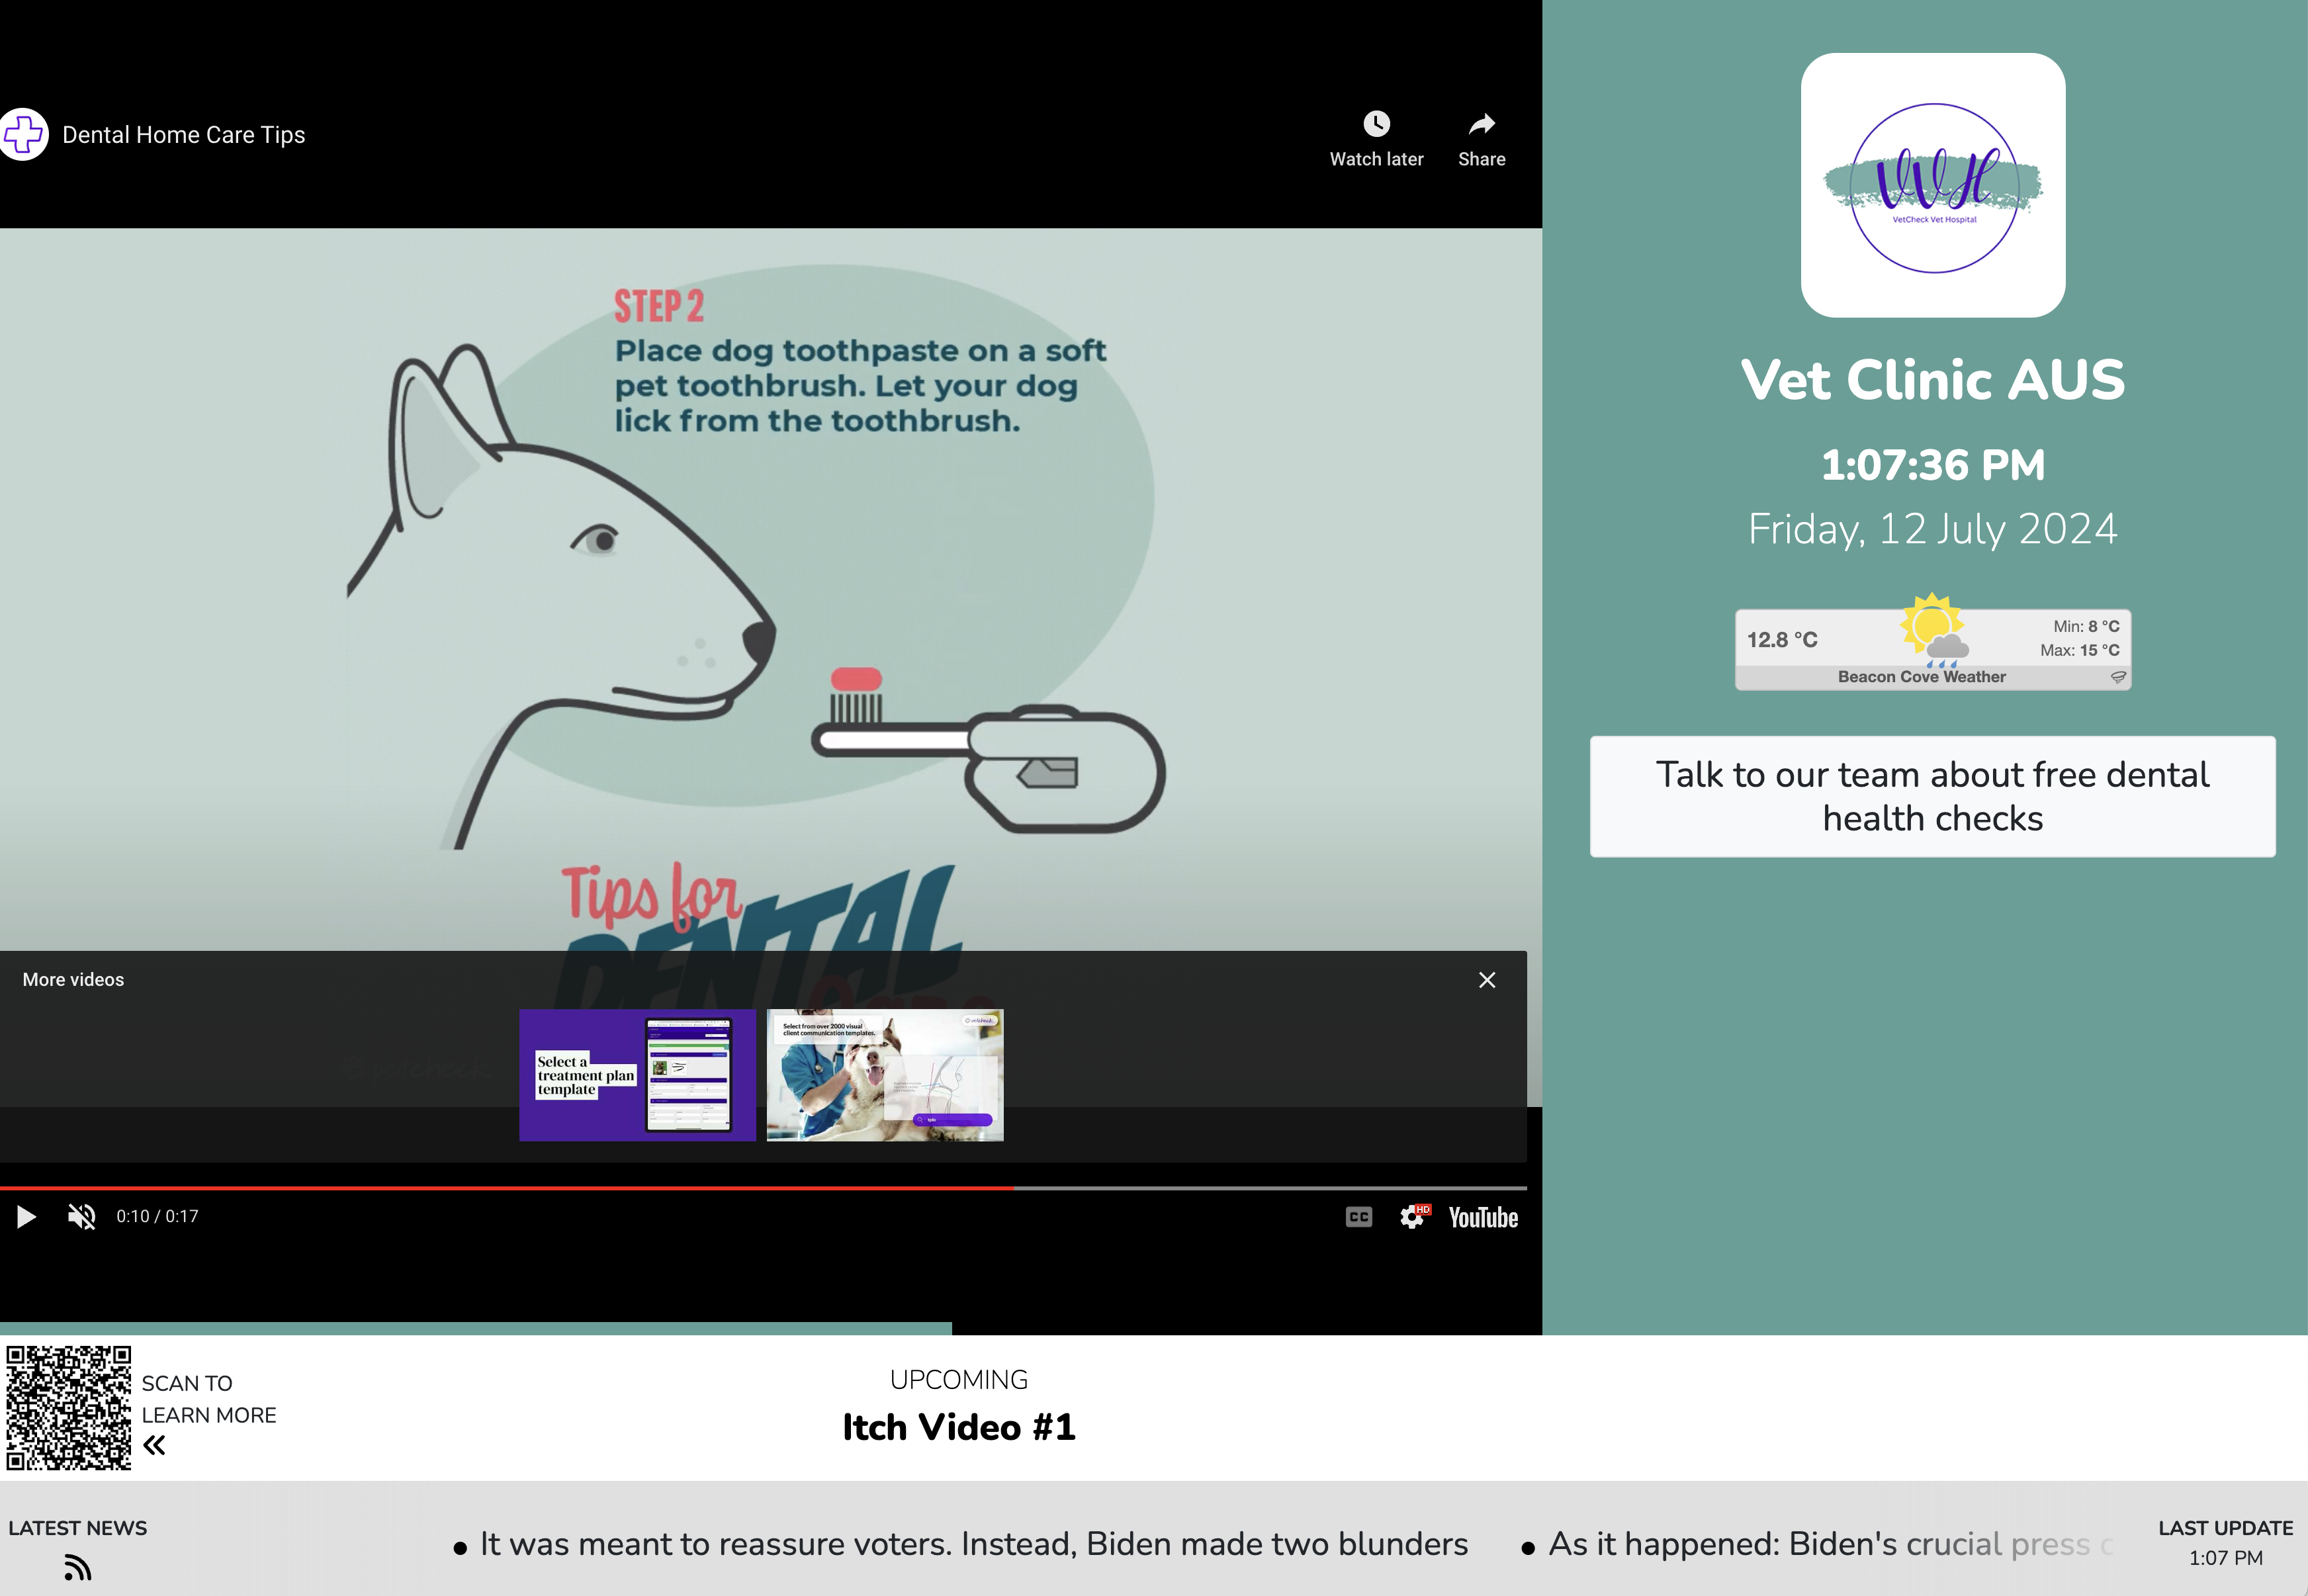
The TV display is made up of:
- Videos covering: Educational home care videos, Pet tips, Vet service promotions, The weather, The latest news
- The weather
- The latest news
How to Display VetCheck TV in Your Clinic's Waiting Room
Smart TV via URL link
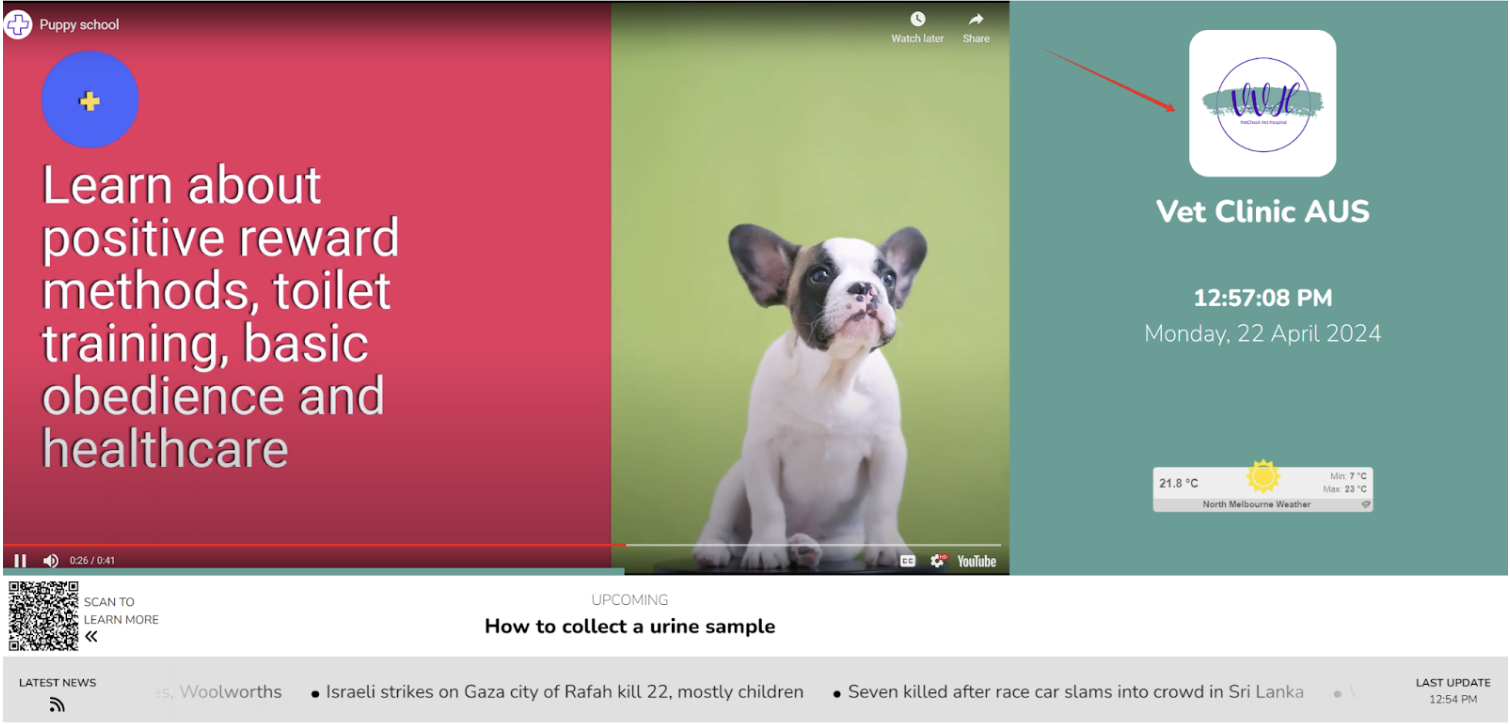
Enter your unique TV Channel URL into a webpage. Once the webpage loads, you will see your clinic's logo at the centre of the page. Click on the logo to expand the VetCheck TV interface to full screen mode. This is how it will appear to your visitors in the waiting room.
Note on Autoplay and Mute:
Please note that due to Google Chrome Privacy, the autoplay feature for videos only functions when the sound is muted. At the start of each day, manually click “unmute” icon and the sound will continue on autoplay for the duration of the day.
Using Chromecast
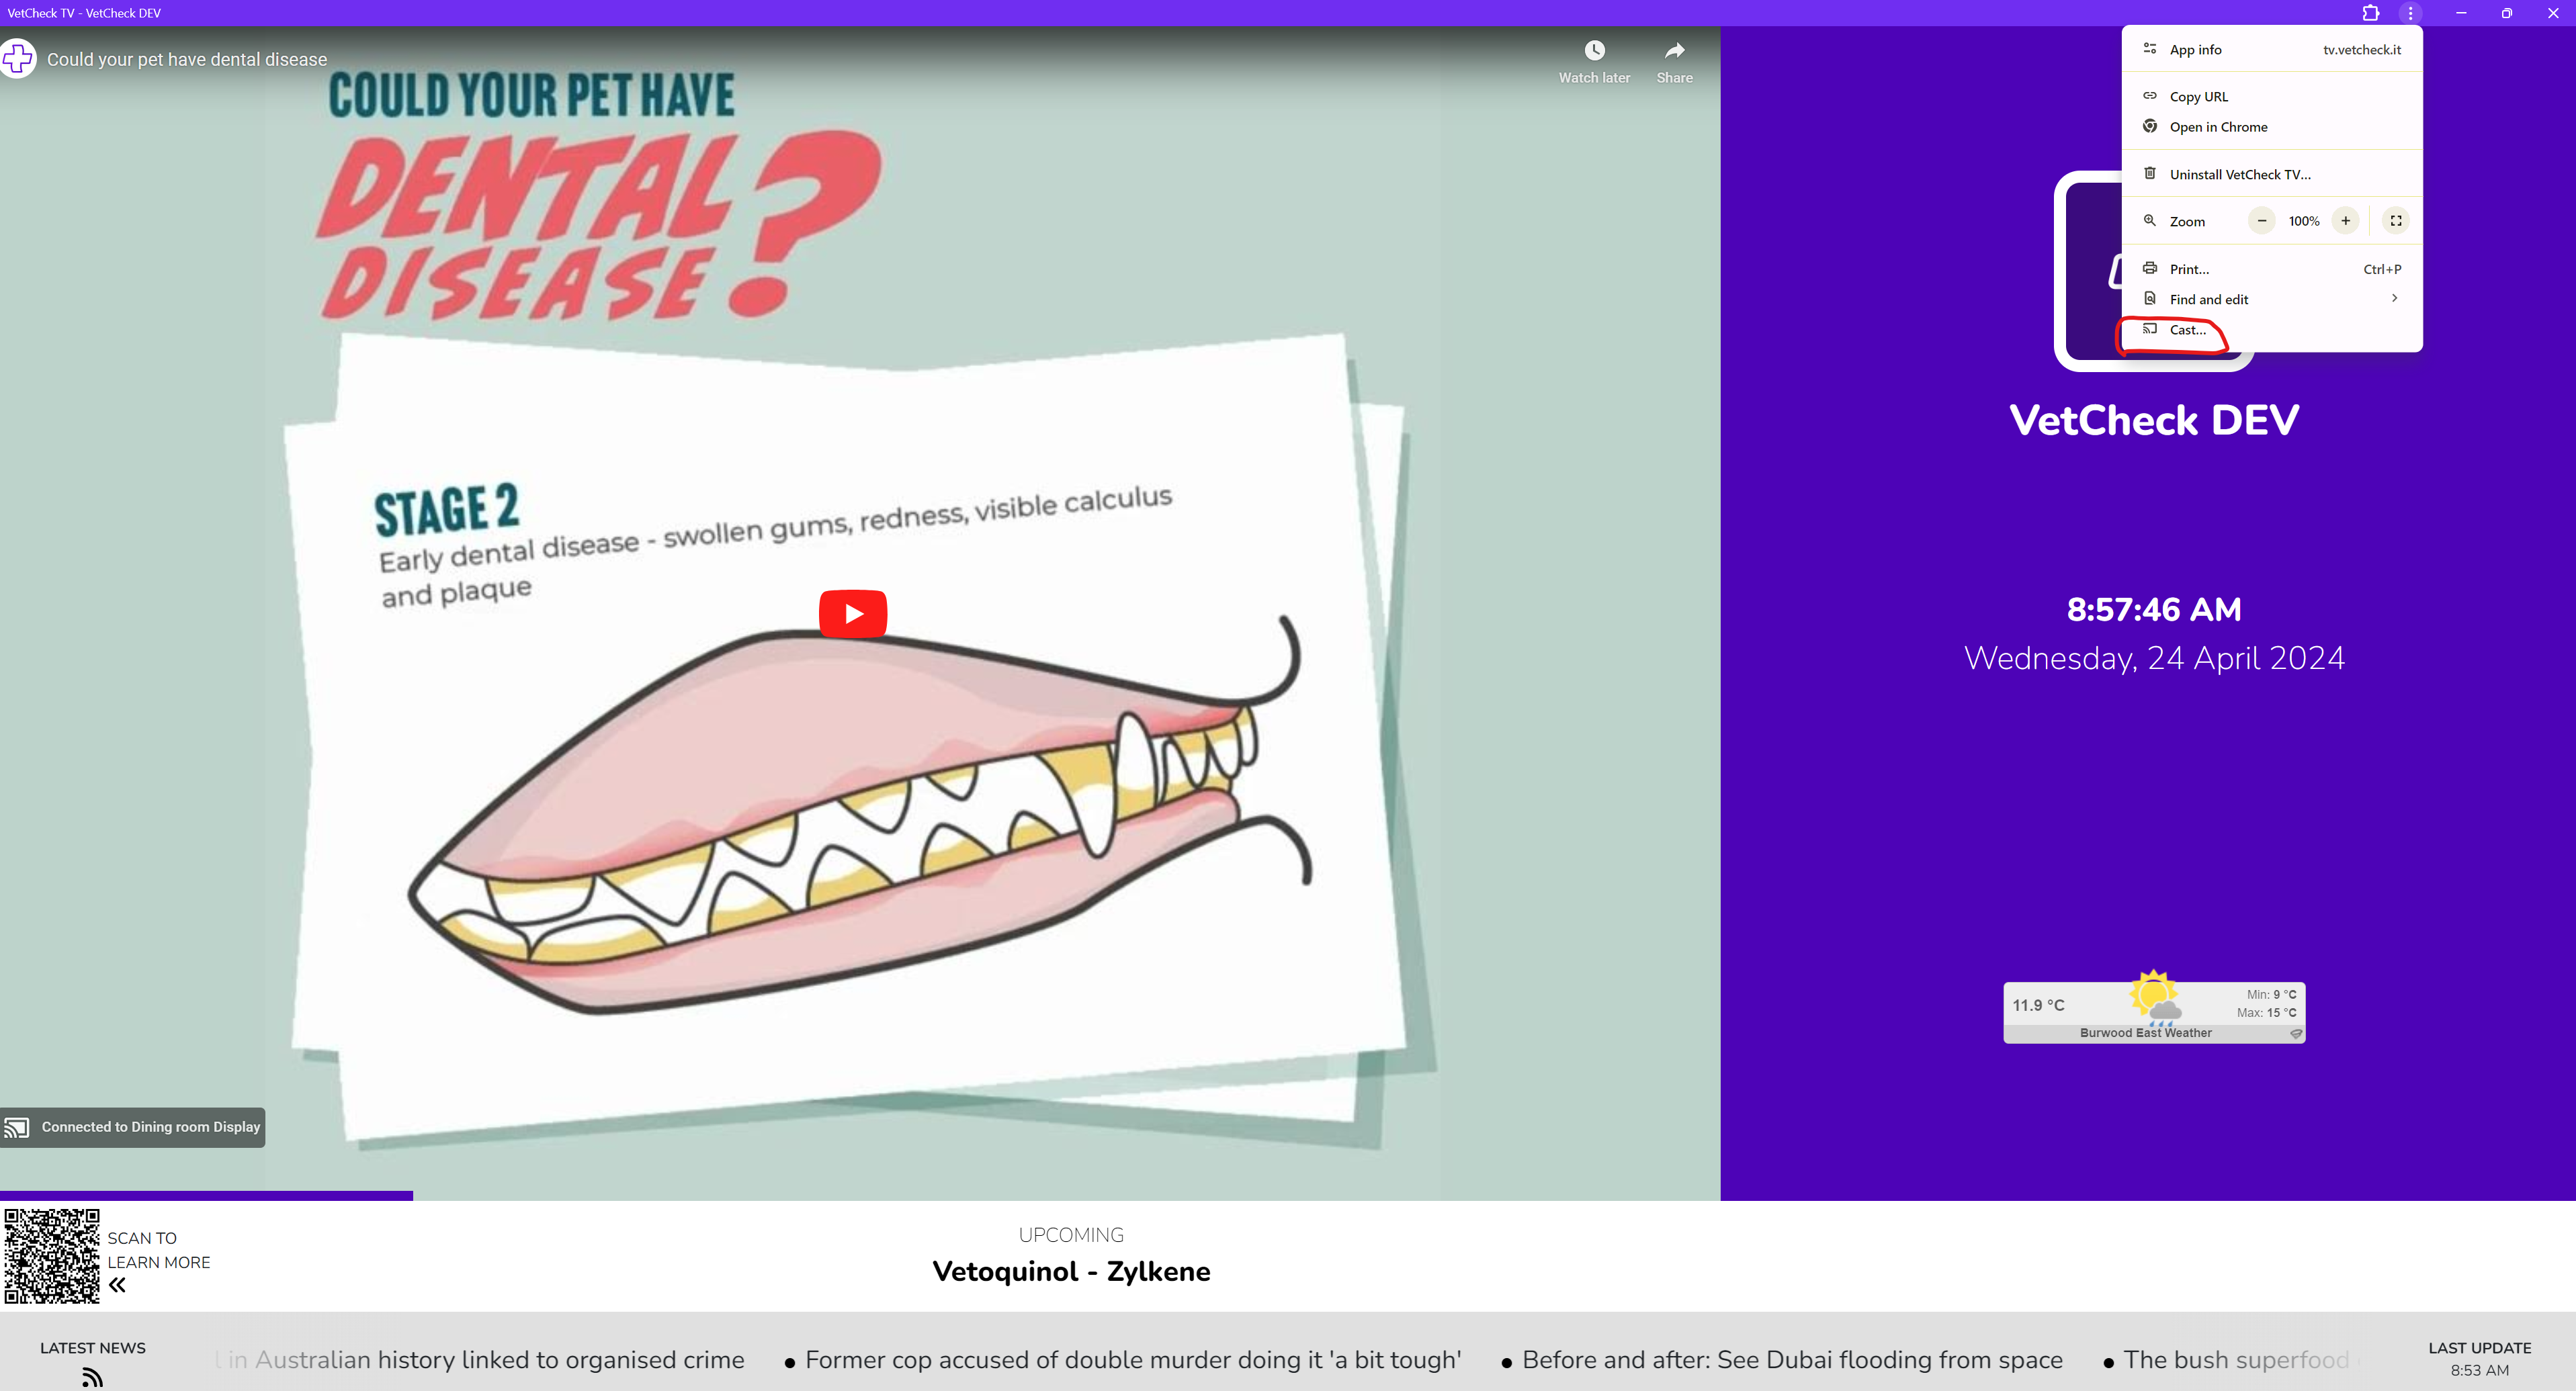
To cast content onto a TV, open the VetCheck TV channel link and click on the "cast button" at the top of the home screen

Click on install

Click on settings and click "cast"
How to Add or Remove Videos
Managing Your Content
To maintain the relevance and quality of the content displayed in your waiting room, you might wish to add or remove videos occasionally.
Personalised videos may include:
- Meet the team, vet nurses, vets or clinic animal
- Specialised services
- Product promotions
To request changes to your video playlist, please email the YouTube link to:
Include your TV link and specific details about the videos you want to add or remove. Our support team will assist you in updating your playlist promptly.
We hope this guide helps you set up VetCheck TV smoothly and enhances your clinic's waiting room experience.
If you have any questions or require further assistance, please do not hesitate to
contact our support team at [email protected]
Please note fees may apply to a customised Clinic TV Channel.
How to Add a Message to your TV Display
The VetCheck TV Channel allows users to add up to date, personalixed messages to the TV screen below your logo and weather.
Message examples types:
- Wait times
- Current promotions
- Specific client directions ie. Fluffy S. to room 3
- No vet in the building until 1pm
How to create or edit a TV message
- Go to the settings menu in VetCheck
- Click on Queue Management
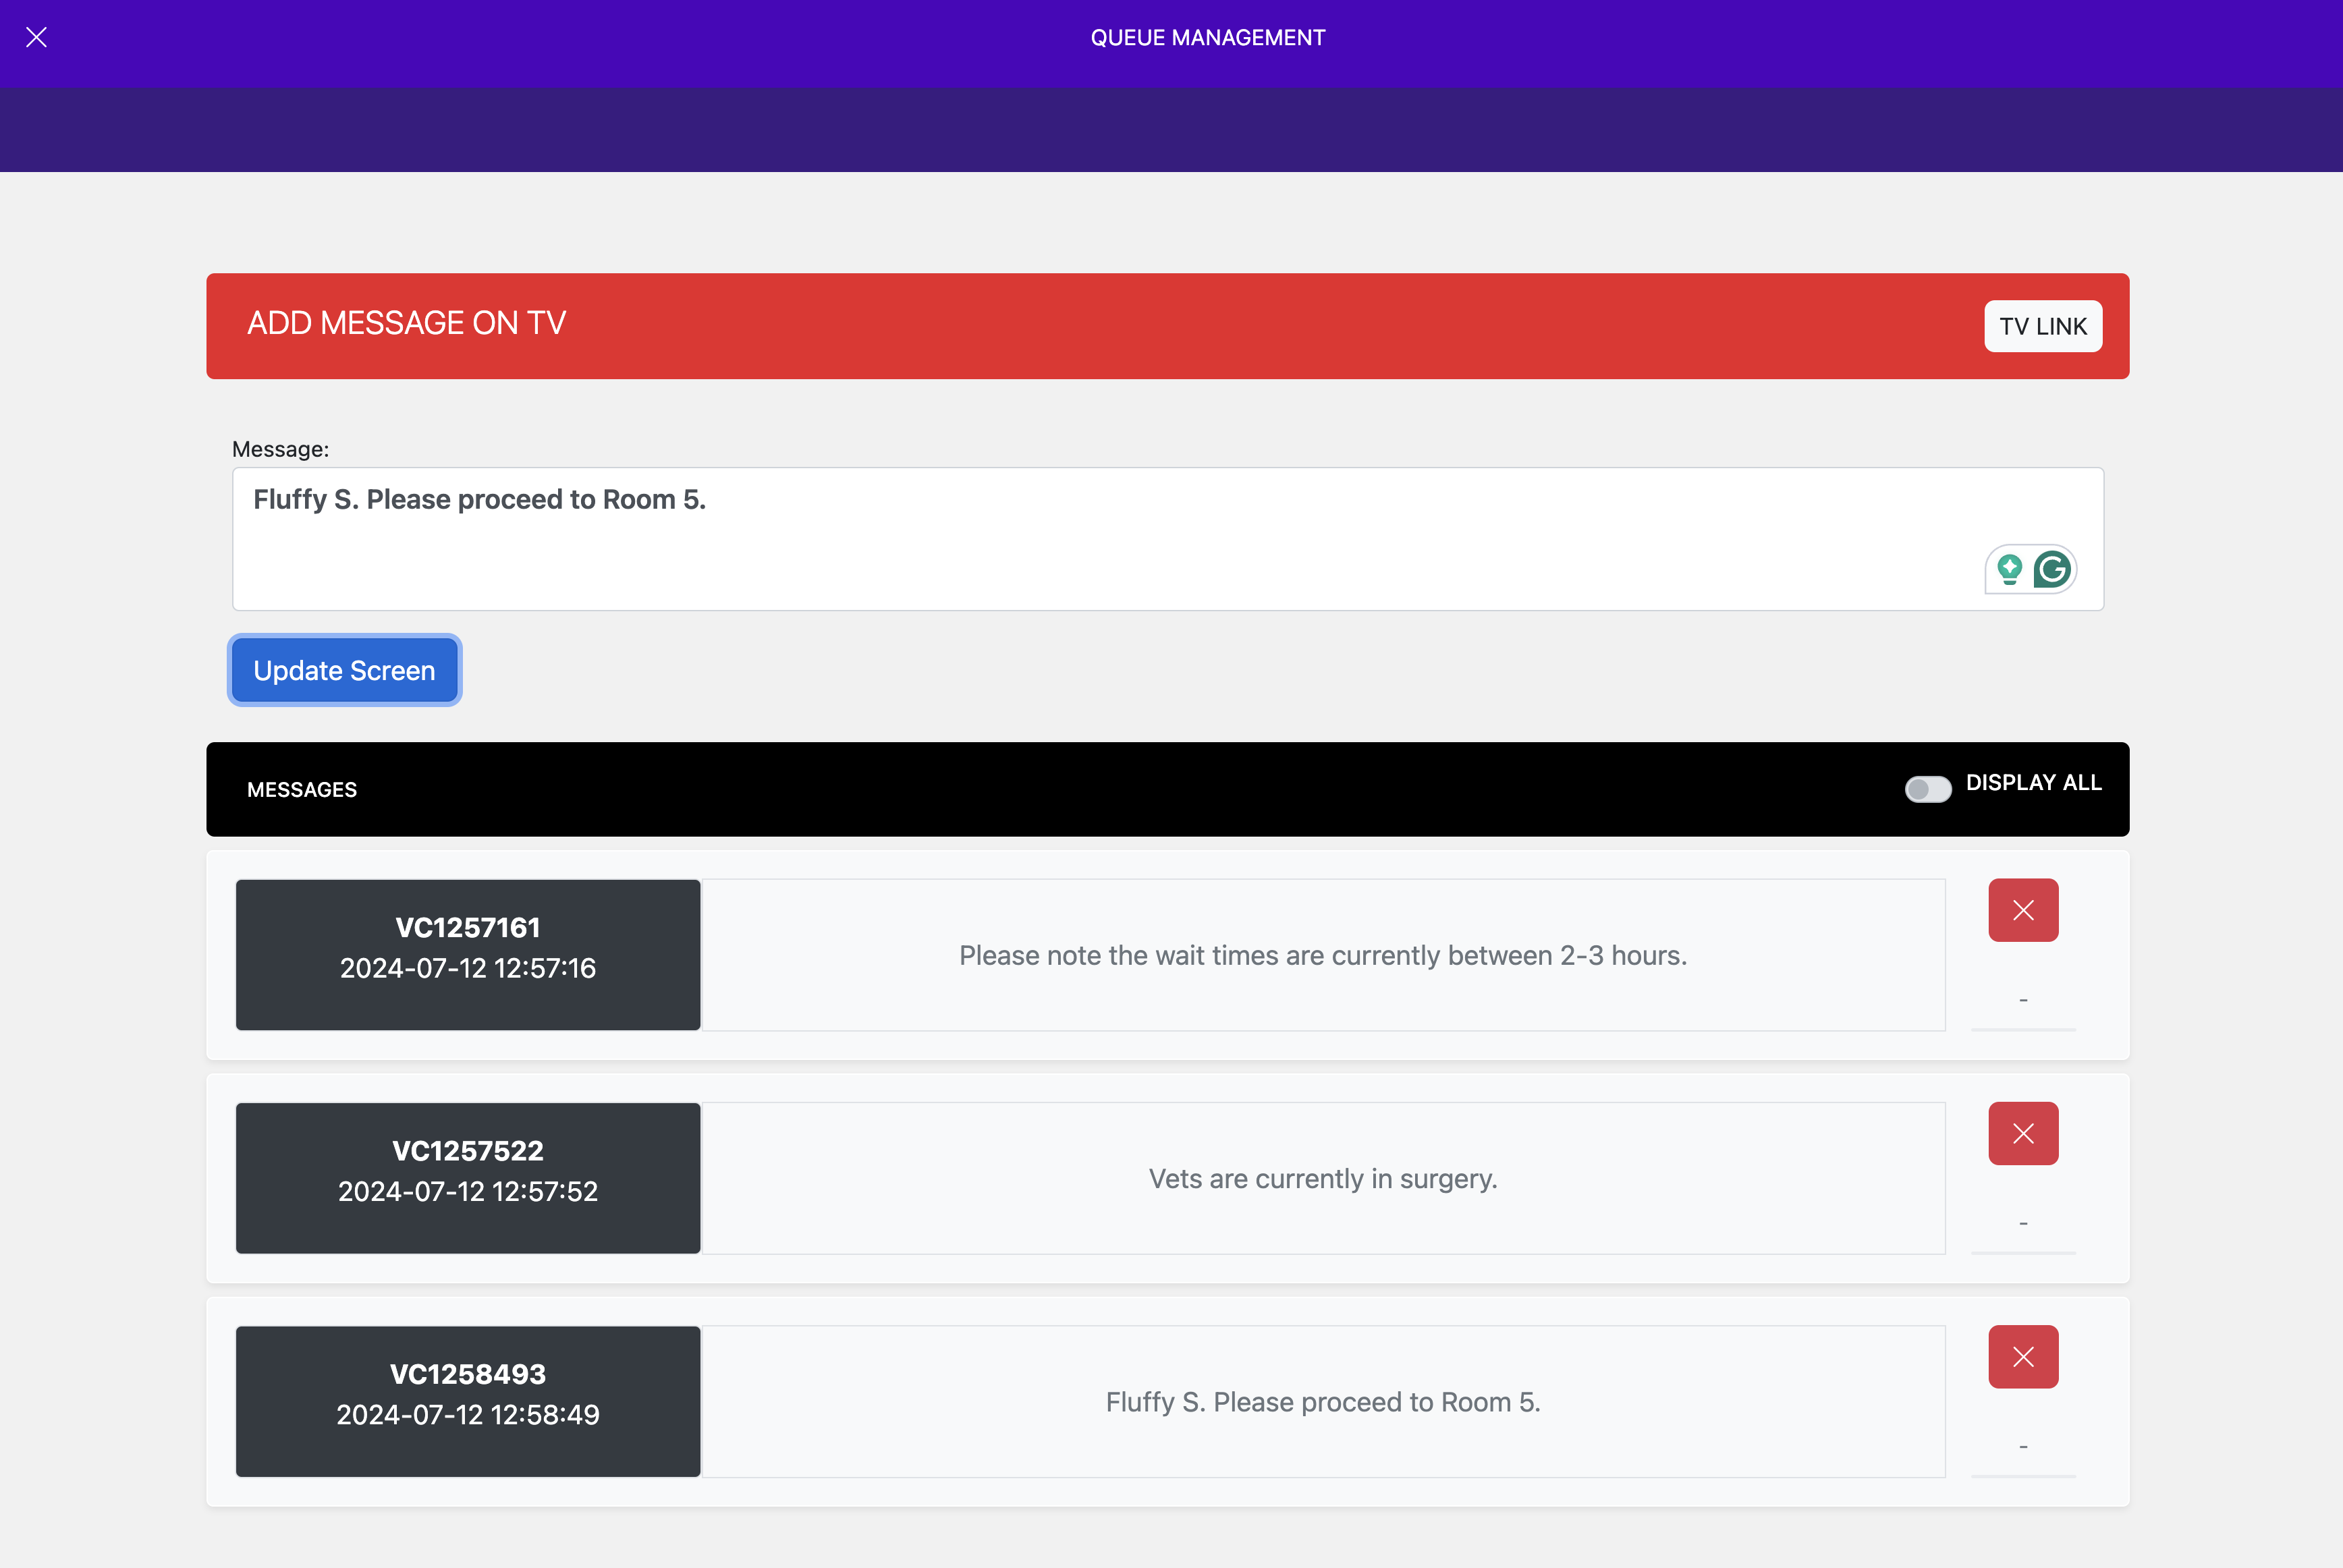
- Enter the message into
- Add your message into the "Add Message on TV" section and click on "Update screen"
- Your TV message will update instantly
- To delete, click on the "X" button on the right handside of the relevant message