Video Demonstration
How to use the dental chart
The digital dental chart can be launched from your practice management system (PMS).
- From within your PMS, click on the VetCheck icon
- Navigate to the “VET FORMS”
- Locate and select the “dental chart”
The client and patient information should pre-fill some data from the PMS. Complete any other data and click on “Create New Chart”
Or launche a new dental chart in the browser and manually enter client and patient information.

Important Notes

- Saving chart: Always click "SAVE CHART" after completing tasks to prevent losing data. The hospital chart will update in real-time within the practice management system.
- Closing chart: Always click "SAVE CHART" and then use "CLOSE CHART" to close chart, do not close the browser directly.
- Submitting chart: Only “SUBMIT” when you have completed the hospital chart at the end of the day or when the pet has been discharged.
- Deleting chart: The DELETE function is for when the chart is no longer required. You must also delete it from the practice management system history.
Client Instructions
Use the pre-loaded templates to quickly give instructions to clients

Add photos
Click on the "IMAGE/DOC" button to take a photo or upload images/documents.

Nerve Block & Radiographs
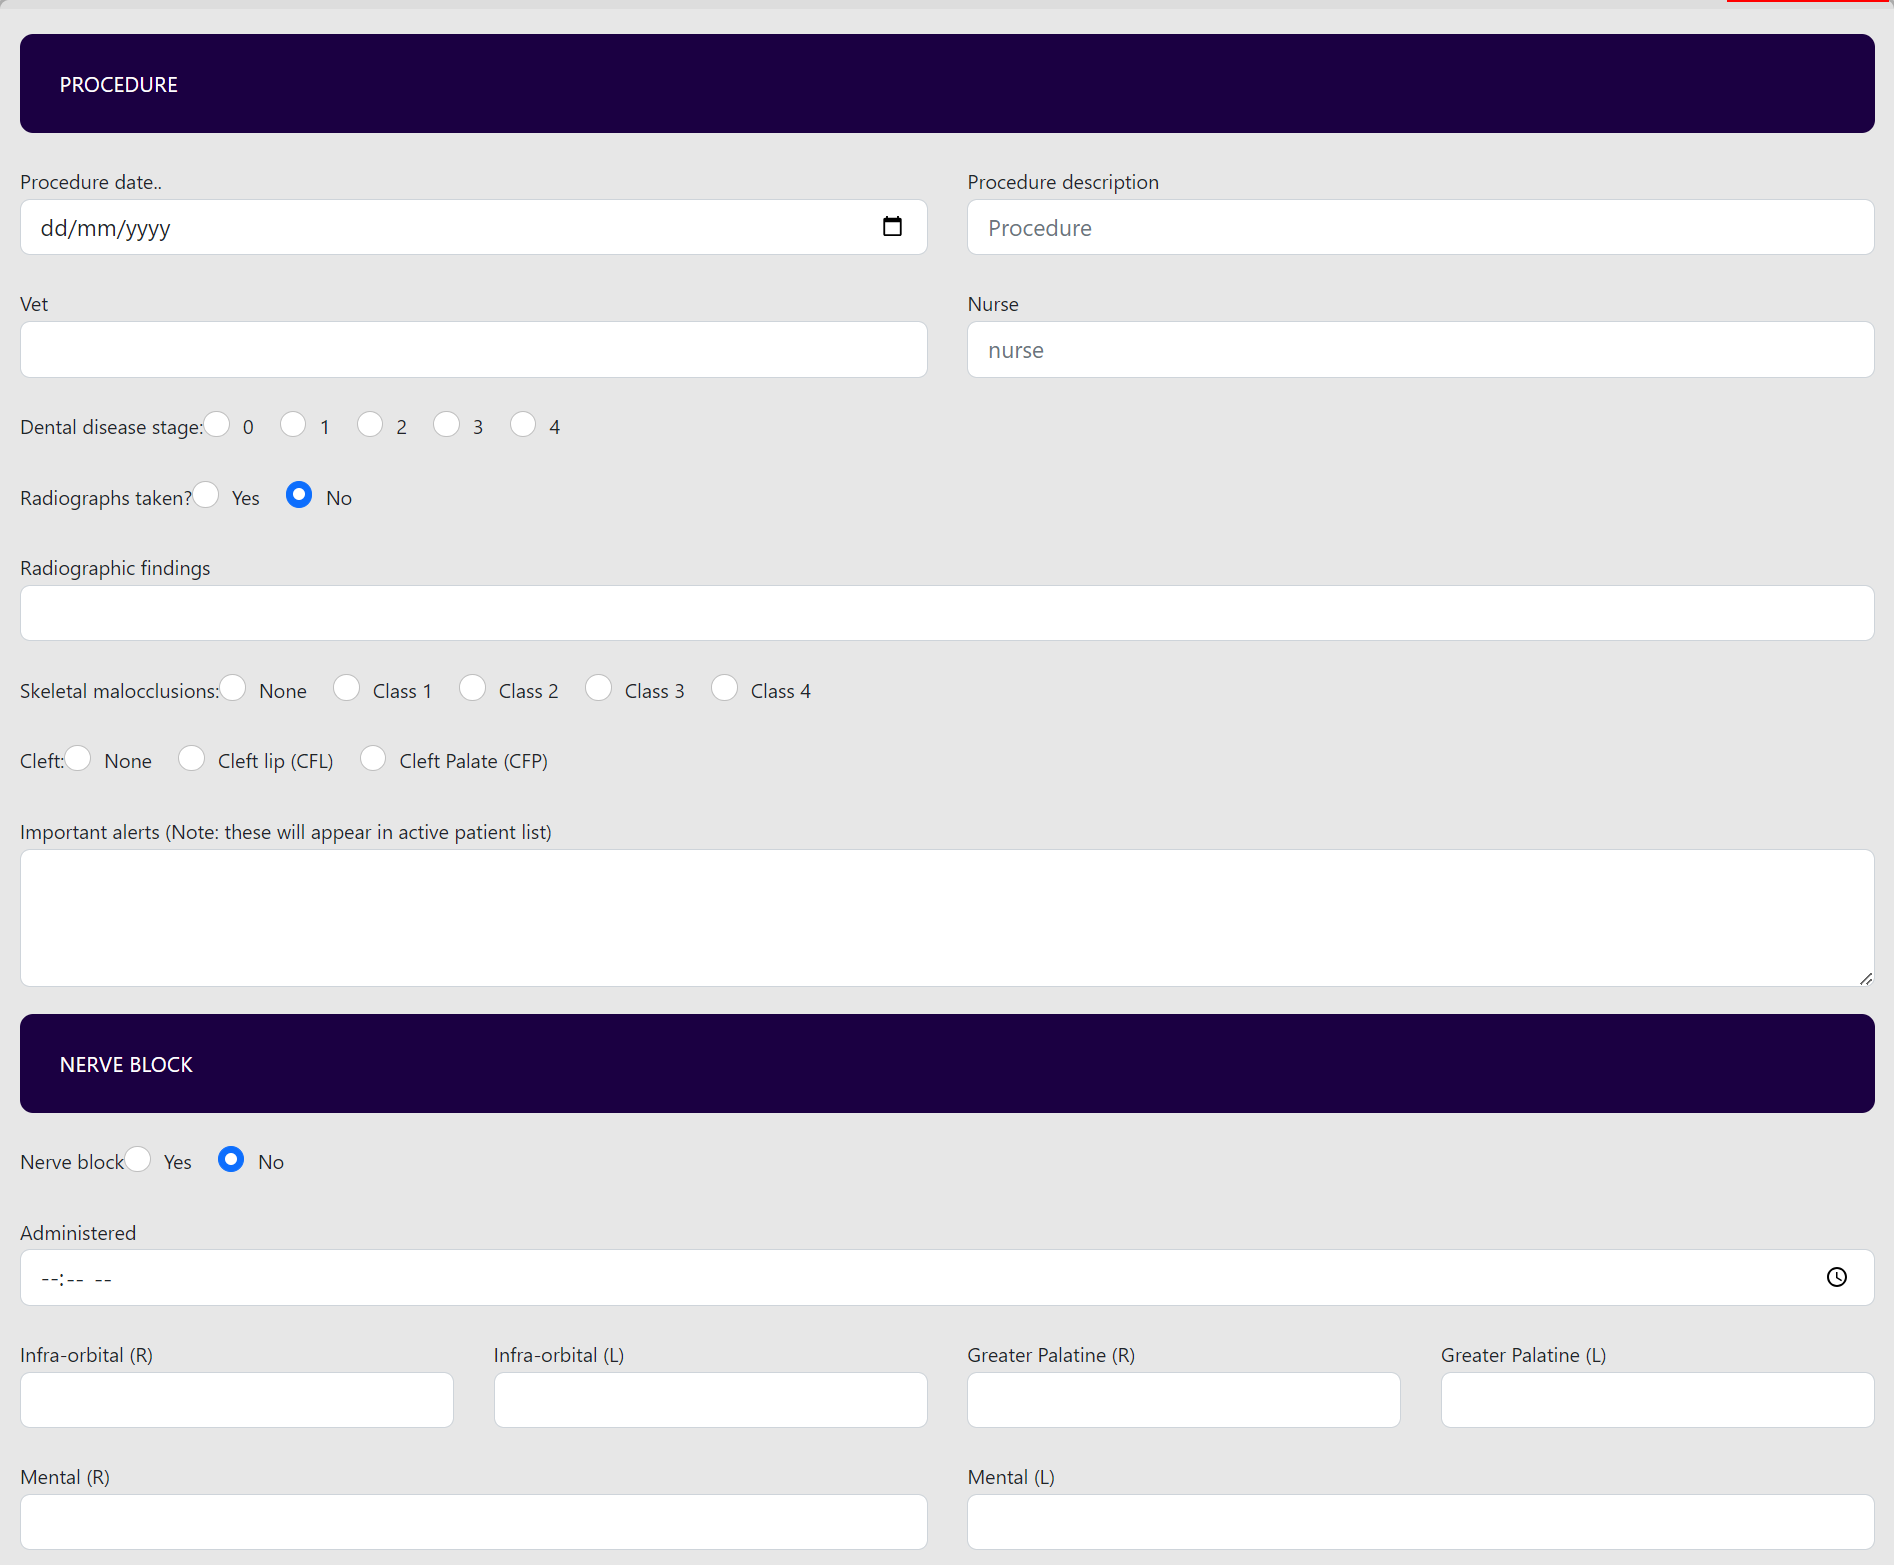
NOTE: If these fields are empty then they will not appear on the finished pet report. If the clinic does not want this type of information being shared with the pet owner, then put the nerve block and radiograph details into the general anaethesia chart. The pet dental report is exactly the same as the record in the PMS patient file.
If you select "No" on Radiograph Taken under 'PROCEDURE' and No under 'NERVE BLOCK' like shown in the image, it won't appear on the submitted pet dental report.
Integrated Tools
- Click the calculator icon in the top-right corner to use the integrated tools
- Click the "DENTAL CHART CODES" button to check all codes.
- Click the "CALCULATOR" button to use the integrated calculator.


Start charting
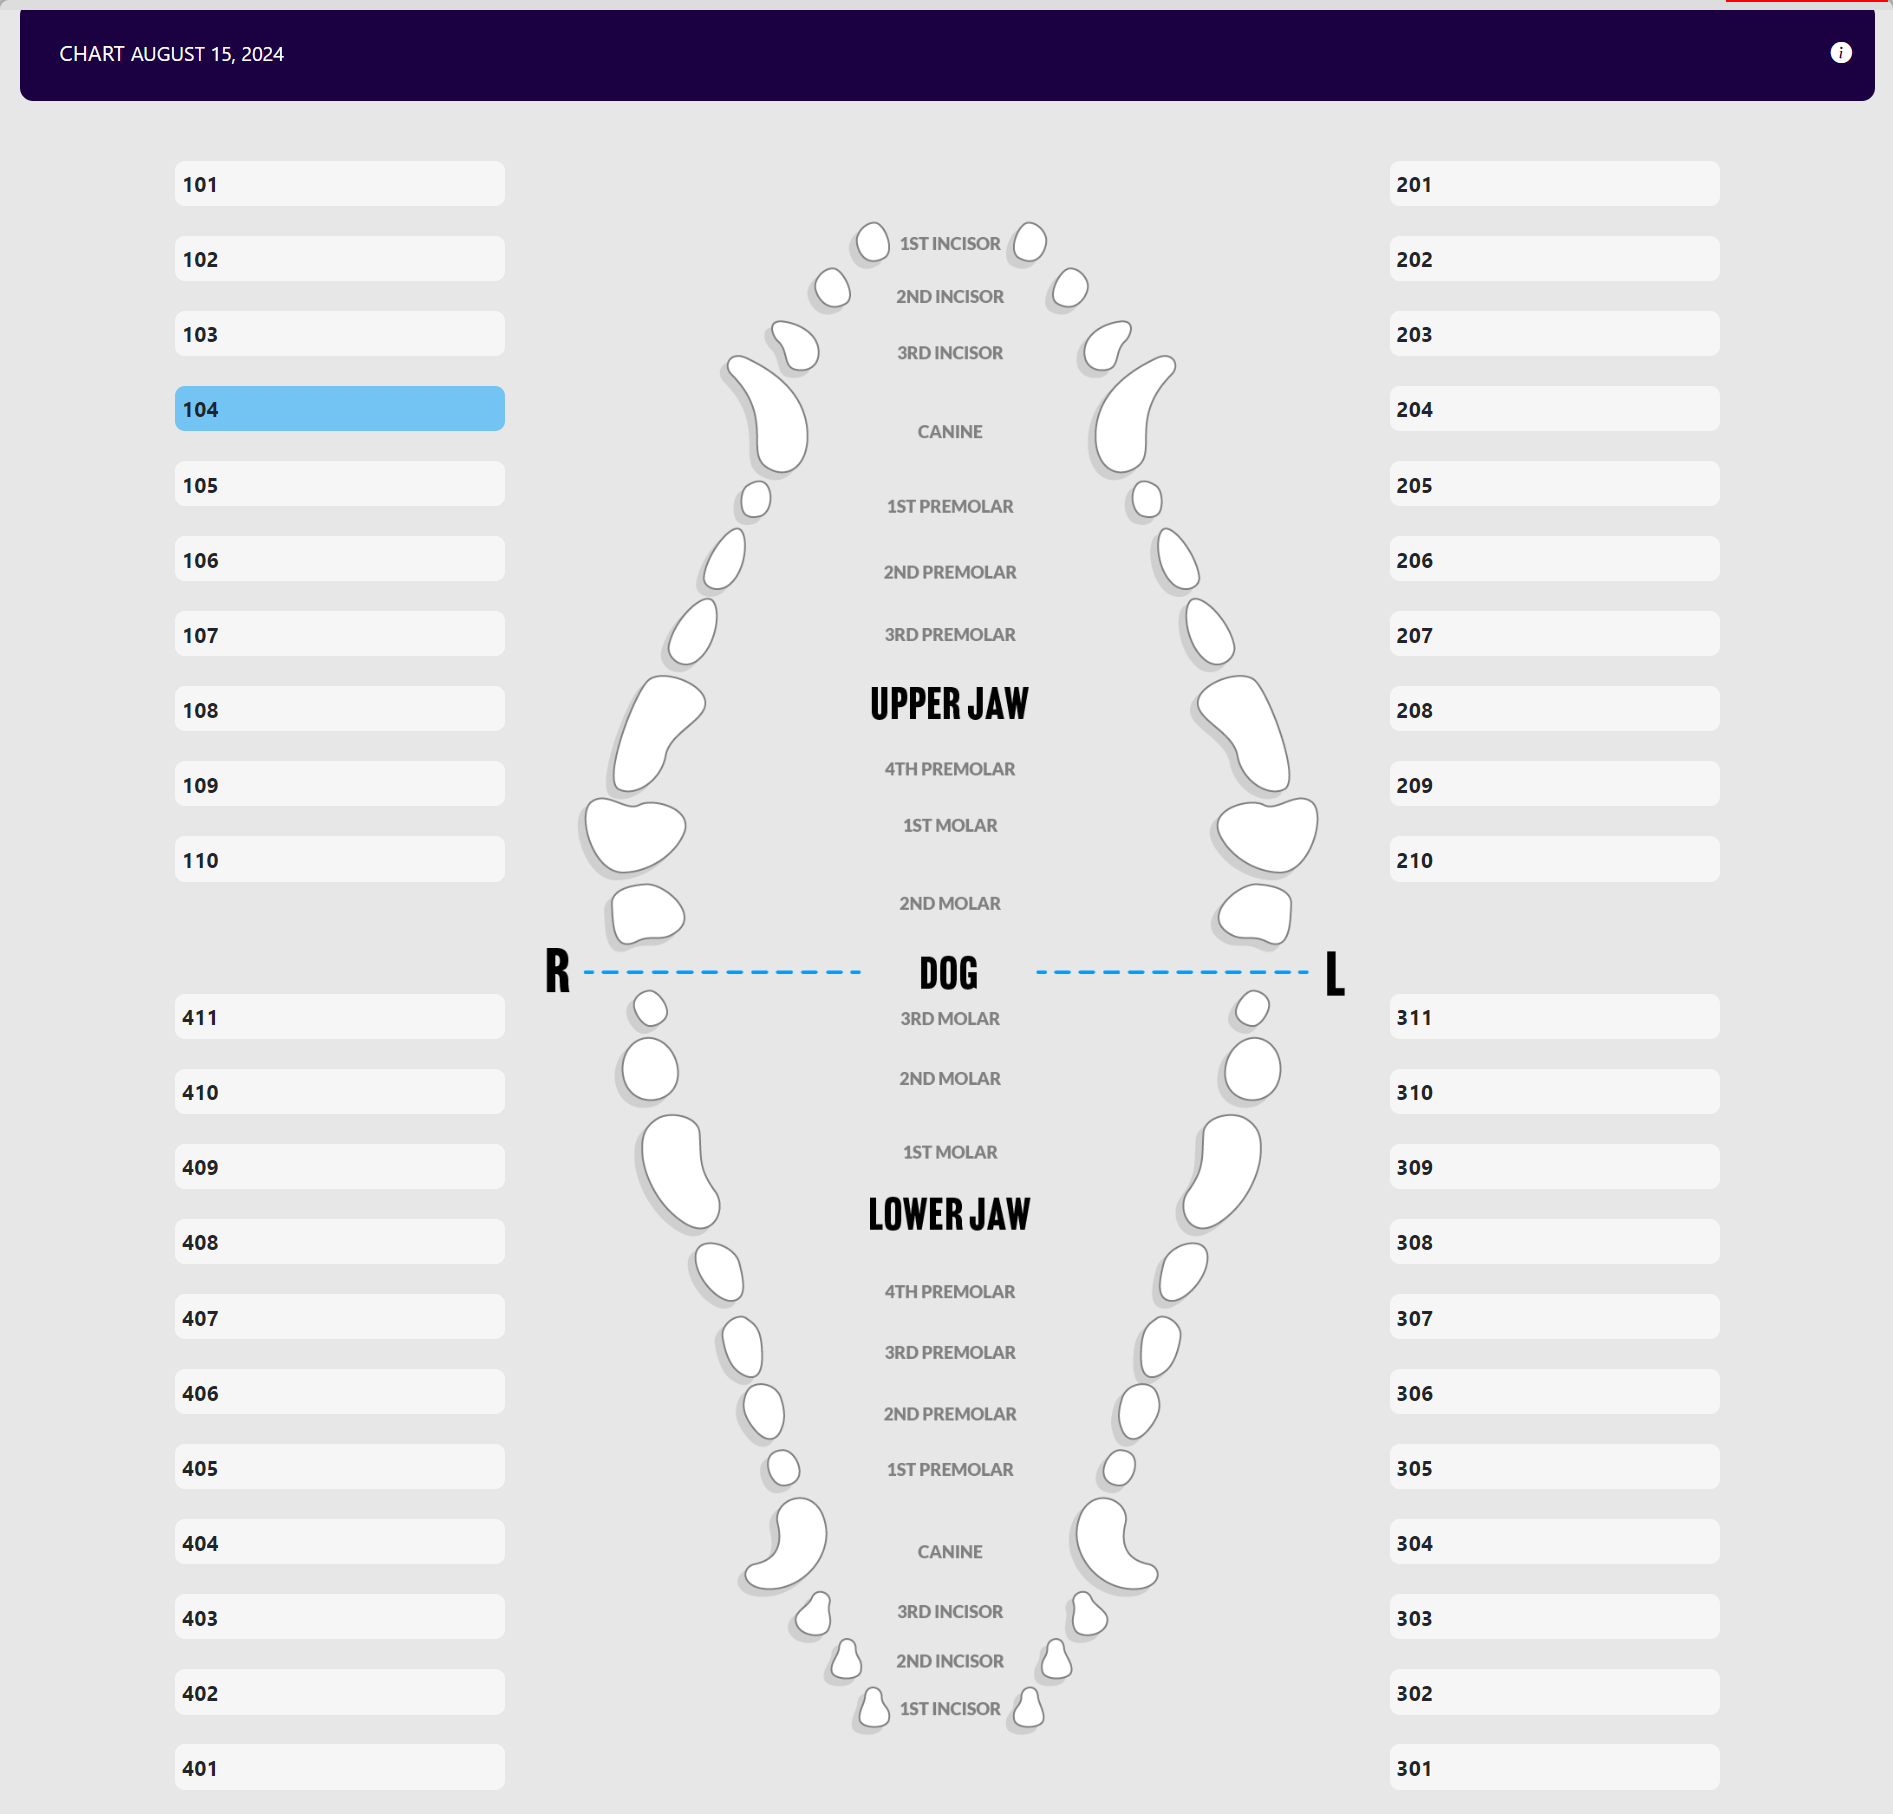
- Scroll down to the dental chart image
- Clicking on the "MARK ALL AS HEALTHY" button will set all of the teeth that contain no data to healthy, i.e. GREEN color
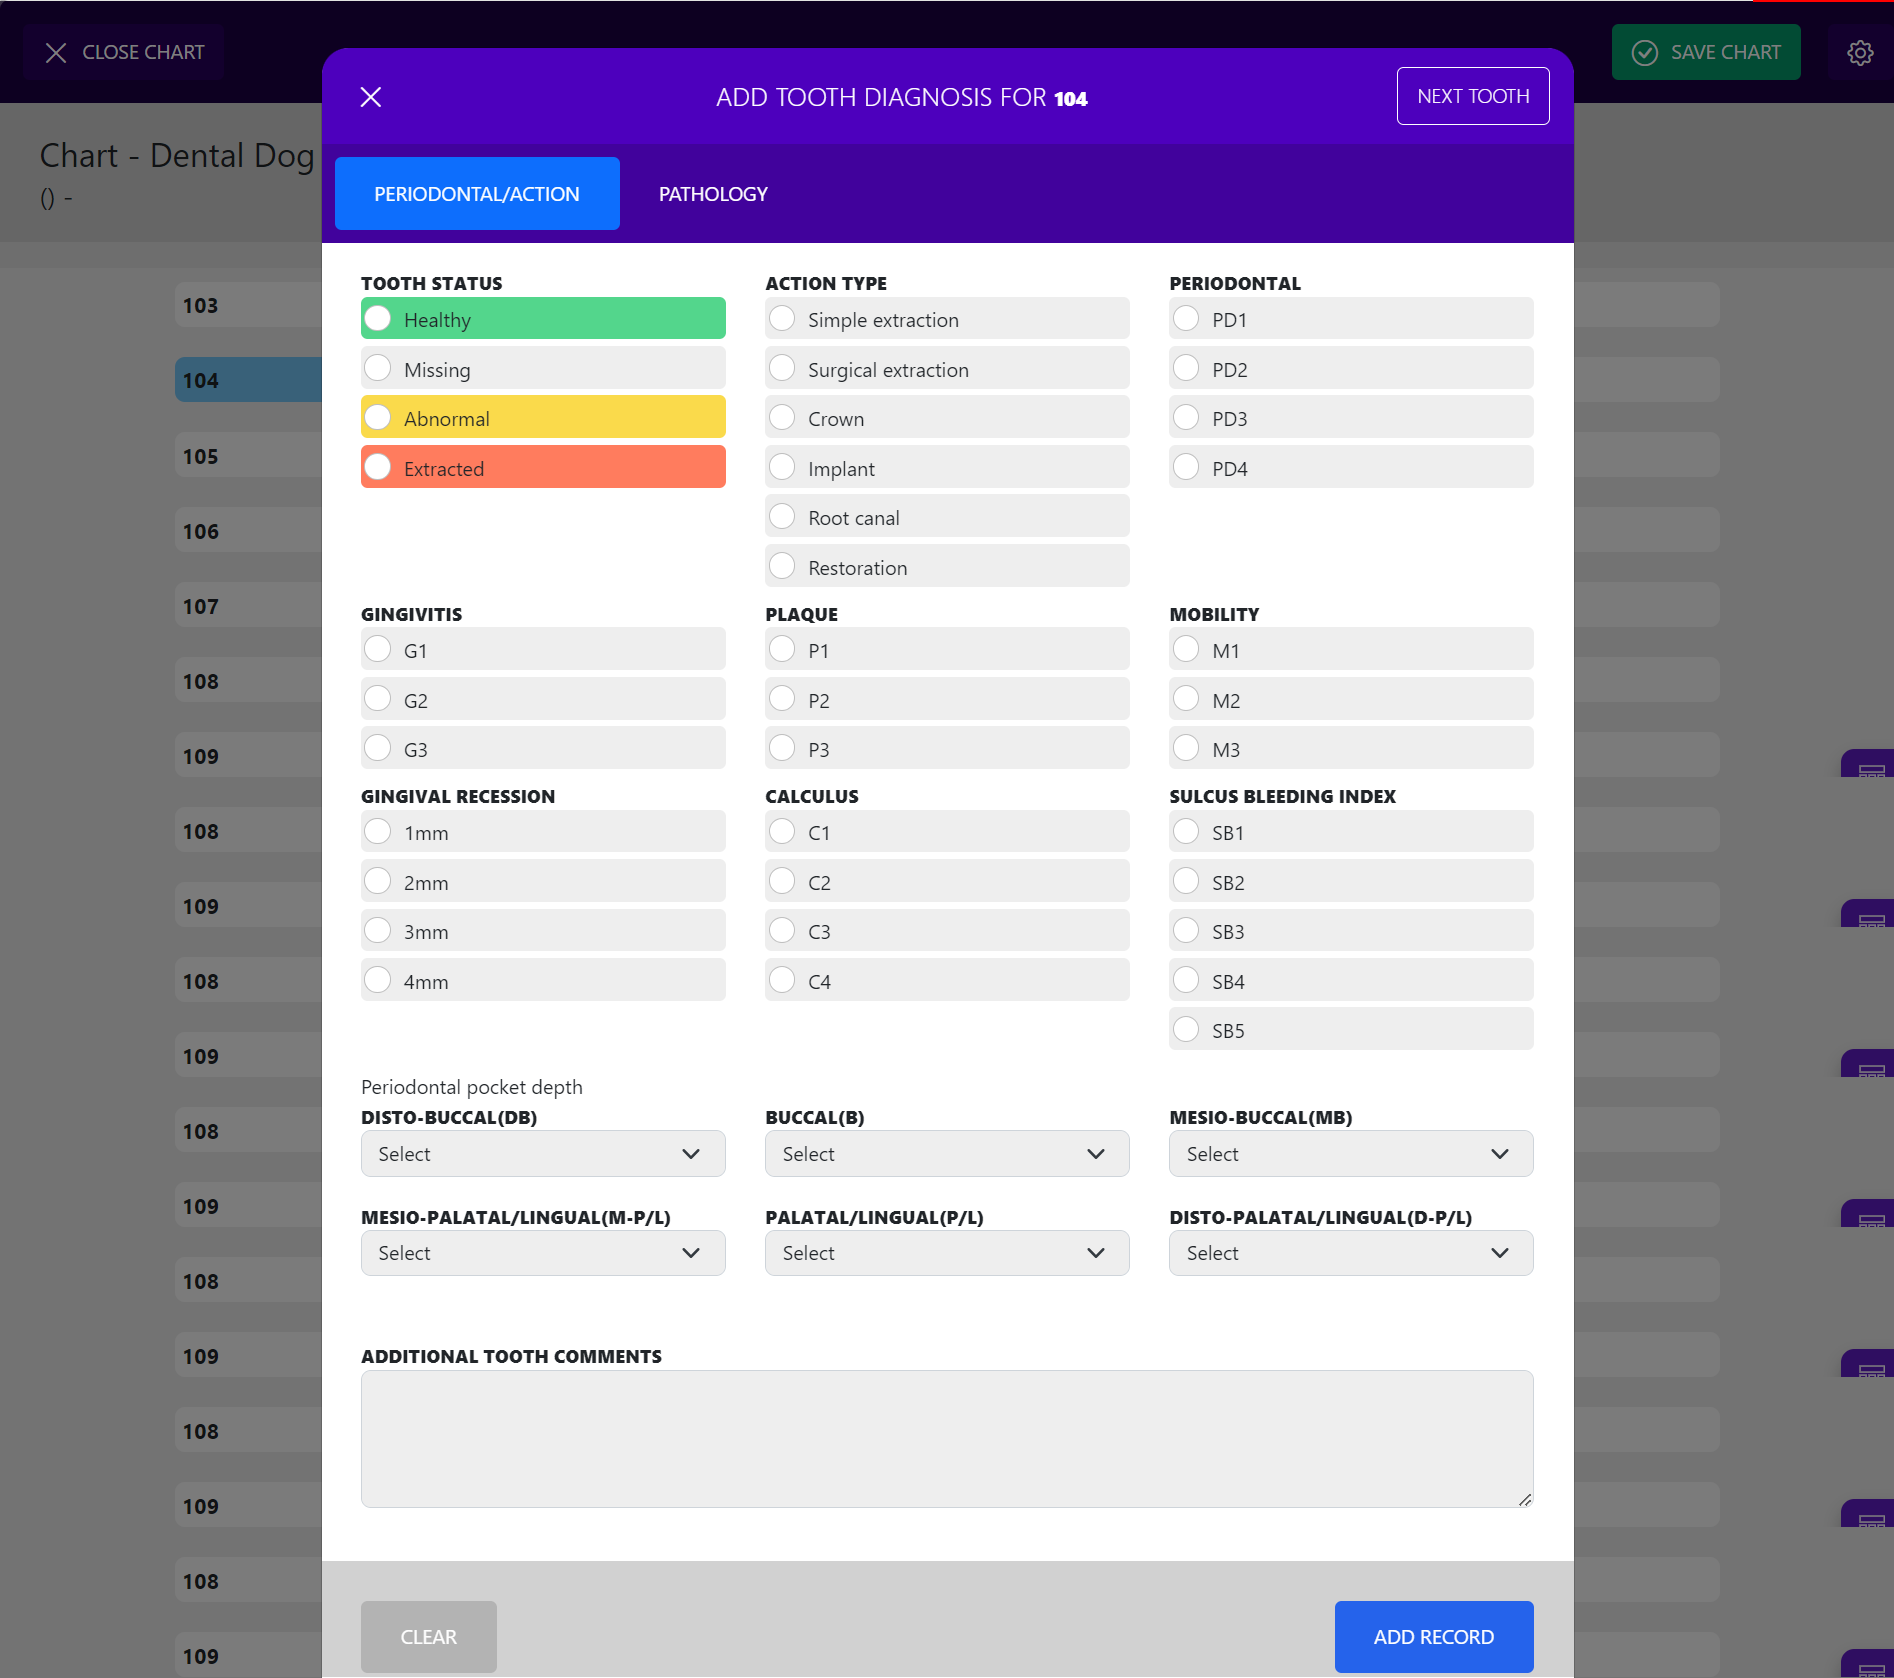
- Click on the tooth you are examining and record the findings within the “ADD TOOTH DIAGNOSIS”.
- If you're working on multiple teeth you can jump to the next tooth by using button labelled as Next Tooth on top-right corner as shown in the image below.
- Your information will automatically be tracked within the chart.
Treatments
Click on the items to add treatments, and add comments as needed.

Medications
Click on the items to add medications, and add comments as needed.

Home Care Recommendations
Click on the items to add home care recommendations, and add ntoes as needed.

Optional Client Instructions
See the multi-share section about adding information sheet links in here as a template.